A super cool art project for making Jar Jack O'Lanterns and glowing monster jars out of used jars (spaghetti sauce, jelly, mayo, pickles, salsa, or whatever!). A great way to recycle those jars, decorate for Halloween and have a fun activity for you and your child of any age!
~~~~~~~~~
Instructions and photos found at instructables.com By
kellybasingerRecycled Jar Jack O'Lanterns!I love to reuse my spaghetti sauce jars to create these beautiful pumpkin lights for All Hallow's Eve! You can use different size jars to make a spooktacular display!
Ingredients:- Glass jar
- Orange tissue paper
- Black construction paper
- Green acrylic paint
- Decoupage glue
- Paint brush
- Scissors
Optional: other things to decorate, a hammer and nail to punch holes in the lid if you want to use the lid but light the candle inside.
Recipe:
Tear orange tissue paper and place glue in an easy to use container. You will be applying the tissue and glue with one hand and the other will be inside the jar.
If your hand is small enough, insert your non-dominant hand inside the jar and then use the other hand to coat the jar with decoupage glue. Lay the strips of orange paper over the jar. Glue and place the paper until the entire surface is covered. Go over the entire surface of the jar with one more thin layer of glue.
Allow to dry for a few hours. In the mean time, create your face with the black paper. When the orange layer is completely dry, glue the black paper on and decorate as you wish.
If you want, you can either paint the lip of the jar green for the stem or punch holes in the jar lid and paint that green. Either works fine!

When the jack o'lantern is completely dry (give it 24 hours after the last coat of glue) place a candle inside and light or place electric lights inside and plug in! Either one gives the pumpkin a lovely glow!
There are great
step by step instuctions on
notsoidlehands.com using this "recipe".
~~~~~~~~~
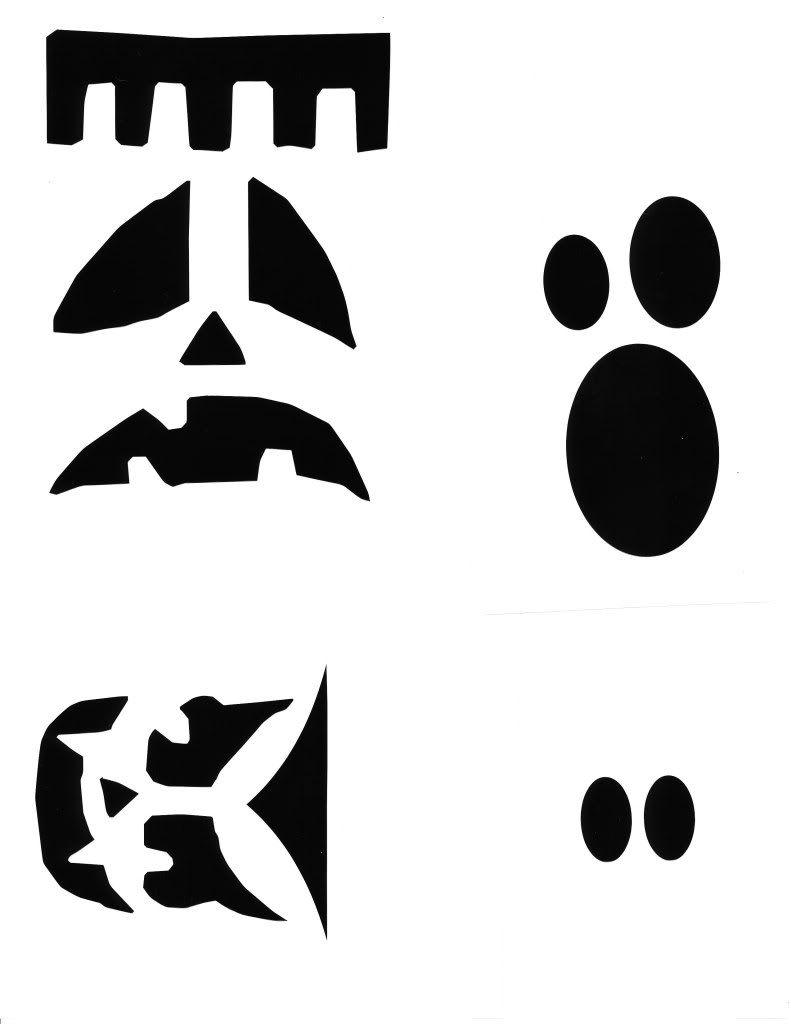
Glowing Monster JarsA variation of the Jar Jack O'Lanterns, these monsters are super fun. They can be found at
notsoidlehands.com. She also included, in that post, an
image of the faces which you can cut out and use.


.jpg)


.jpg)
.jpg)
.jpg)
.jpg)
.jpg)
.jpg)


.jpg)

.jpg)
.jpg)
.jpg)

.jpg)


